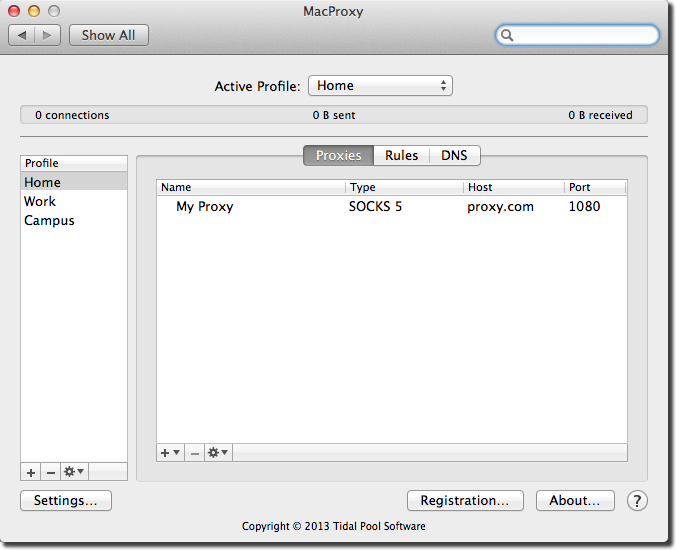
Proxies
Proxies contain the settings required to connect to a proxy server or proxy chain. To add or modify a proxy, select a profile and then the
Proxies tab in the MacProxy System Preferences pane.
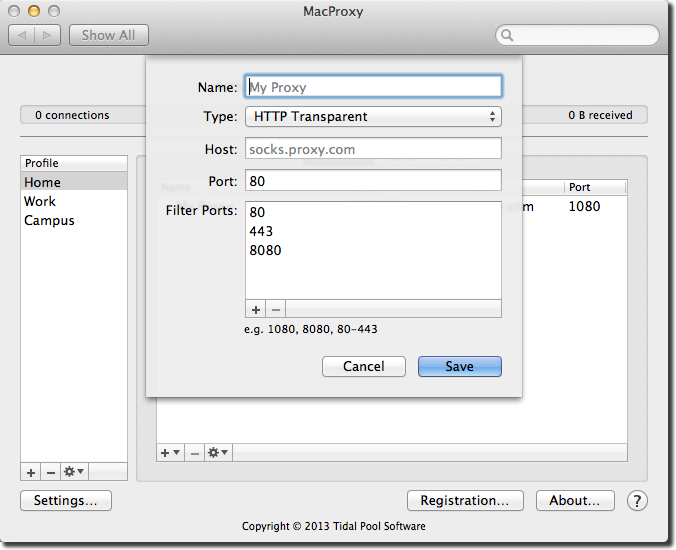
To add a new proxy, click the + button on the bottom bar and select
Add Proxy. Enter the proxy name and then select the type. MacProxy supports HTTP Transparent, HTTP Non-Transparent, HTTP Connect, SOCKS 4, SOCKS 4A, and SOCKS 5 proxy protocols as well as SSH Tunnels. If you're unsure of the proxy type, use the proxy checker (described below). The
Host may be either a domain or IP address. Enter the proxy port.
For HTTP proxies, configure which client ports to proxy. Only the ports listed are intercepted and forwarded to the HTTP proxy server. Generally this list includes 80, 443, and 8080 (note that 443 is not filtered for HTTP Non-Transparent proxies). Enter the
Username and
Password (if applicable) for HTTP Non-Transparent and HTTP Connect proxies. For HTTP Non-Transparent proxies, select the
Anonymize Requests option to remove user identifying HTTP headers.
For SOCKS proxies, enter the
User ID for SOCKS 4 and 4A proxies or the
Username and
Password for SOCKS 5 proxies (if applicable).
For SSH Tunnels, enter the
Username and
Password (if applicable). Select the
Client Key to use the client's private key for authentication. Select the
Server Key to validate the server when connecting. If the client/server key is supported, the key's "fingerprint" will be displayed. Next, select the preferred
Cipher to use. Finally, to prevent the server from closing an idle connection, enable the
Server Alive Interval and enter the number of seconds MacProxy should wait before updating an idle connection.
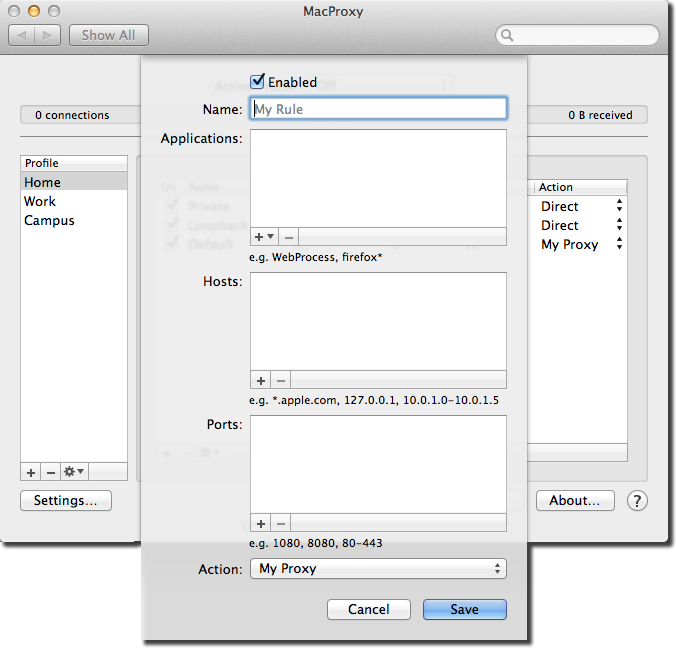
To add a new proxy chain, click the + button on the bottom bar and select
Add Chain. Enter the proxy chain name. Chains may contain any number of SOCKS proxies, however, are limited to at most one HTTP proxy, which must be at the end of the chain, and at most one SSH Tunnel, which must be at the start of the chain. To add a proxy to a chain, drag a proxy onto the chain. To copy an existing proxy to the chain, hold down the Option key and drag the proxy to the chain. MacProxy will open proxies in the order specified in the chain. Reorder proxies within a chain by dragging them to a new location. Note that proxies within chains are indented in the list.
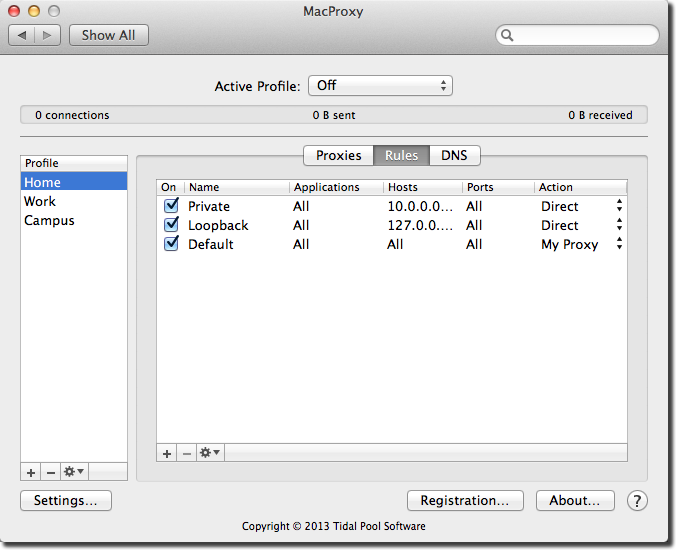
To delete a proxy, select it and then click the - button. The proxy settings button allows you to edit, duplicate, and display the proxy checker. Select a proxy first to edit or duplicate the proxy.
The proxy checker provides a convenient way to test a proxy and determine the protocol a proxy server supports. All HTTP and SOCKS proxy protocols are supported, however, SSH Tunnels and proxy chains are not supported. To check a proxy server, select a proxy from the list or clear the selection, then select
Proxy Checker from the proxy settings button. If a proxy was not selected, enter the connection details including the username and password, if required. If a supported proxy protocol is detected from the server, the
Add Proxy button is enabled to add the proxy to the profile. Note that the proxy checker is disabled when MacProxy has an active profile selected.